
guide for mirror led strip
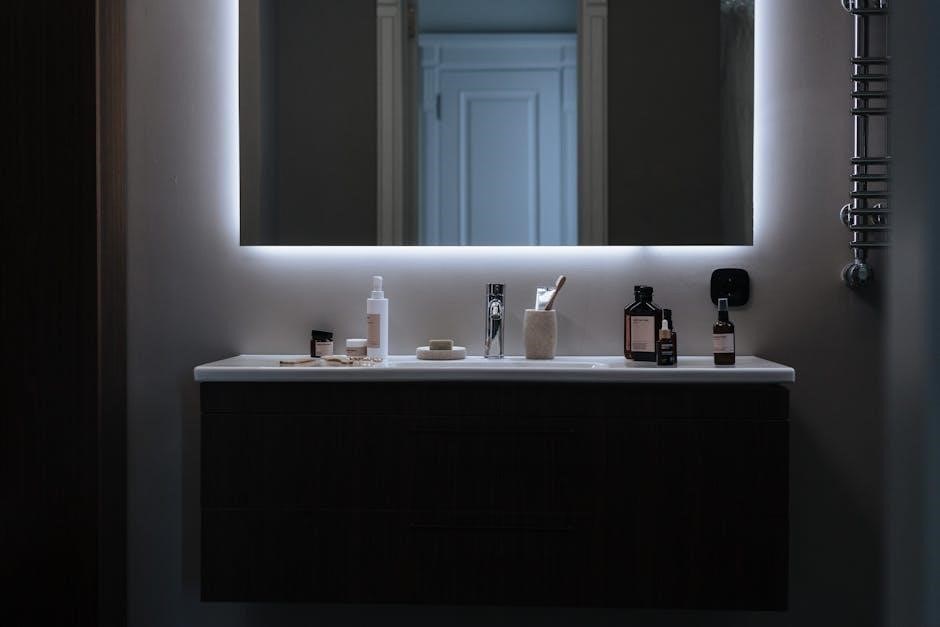
Mirror LED strips offer a modern way to enhance your space with ambient lighting. They provide versatile backlighting solutions, improving aesthetics and functionality. With various color temperatures and energy-efficient designs, these strips are perfect for creating a sophisticated ambiance while saving energy. Their easy installation and durability make them a popular choice for home and commercial use.
Choosing the Right LED Strips for Your Mirror
Selecting the ideal LED strip involves considering brightness, color temperature, and size to match your mirror’s dimensions and desired lighting effect. Ensure the strip is energy-efficient and durable.
2.1. Understanding Brightness and Color Temperature
Brightness, measured in lumens, determines how intense the light will be. For vanity or bathroom mirrors, higher lumens (e.g., 1000-2000) provide task lighting, while lower lumens (e.g., 500-800) create ambient effects. Color temperature, measured in Kelvin, ranges from warm white (2700K-3000K) to cool daylight (5000K-6500K). Warm tones mimic traditional lighting, ideal for cozy settings, while cool tones enhance clarity, perfect for makeup or grooming. Choose a temperature that aligns with your desired ambiance. Additionally, consider the color rendering index (CRI) for accurate color reflection. Higher CRI values ensure vibrant, true-to-life colors, crucial for tasks requiring precision. Balancing these factors ensures your LED strip meets both functional and aesthetic needs.
2.2. Selecting the Correct Size and Flexibility
Choosing the right size and flexibility for your LED strip is essential for a seamless installation. Measure your mirror’s dimensions to determine the length of the strip needed, ensuring it fits perfectly without excess. Consider the shape of your mirror; for rounded or irregular shapes, opt for a flexible LED strip that can bend without breaking. Rigid strips are better for straight edges. Check the product’s flexibility rating, as some strips are designed for tight corners or curved surfaces. Additionally, ensure the strip’s width matches your mirror’s frame or intended application. Proper sizing ensures even lighting distribution and a polished appearance. Flexible strips are ideal for wrapping around edges or creating border effects, while rigid strips offer stability for straight applications. Always consider the mirror’s shape and your desired lighting pattern when selecting the size and flexibility of your LED strip.
Step-by-Step Installation Guide

Transform your mirror with a professional LED strip installation. Gather materials, clean the surface, measure, and cut the strip. Apply it evenly, secure corners, and connect to power. Test and enjoy!
3;1. Gather Necessary Materials and Tools
To ensure a smooth installation process, start by gathering all essential materials and tools. You will need a high-quality LED strip specifically designed for mirrors, a power supply unit compatible with your LED strip, and a remote control or switch for easy operation. Additionally, prepare a measuring tape, scissors or a cutter to trim the LED strip to the desired length, and a cleaning cloth to wipe the mirror surface. For a secure installation, have adhesive-backed clips or brackets ready, along with connectors for seamless wiring. If your LED strip requires additional mounting hardware, such as double-sided tape or screws, ensure these are available. Finally, grab a screwdriver and a pair of pliers for any minor adjustments. Proper preparation ensures your LED strip installation is efficient and professional.
3.2. Prepare the Mirror Surface for Installation
Preparing the mirror surface is crucial for a successful LED strip installation. Begin by thoroughly cleaning the mirror to remove any dirt, dust, or grease using a glass cleaner and a lint-free cloth. This ensures the adhesive backing of the LED strip adheres properly. Next, inspect the mirror for any imperfections or irregularities. For frameless mirrors, consider adding a border or applying the LED strip 2 inches from the edge to create a seamless look. If your mirror has a frame, ensure the LED strip fits snugly within the frame’s dimensions. Finally, allow the mirror to dry completely before proceeding with installation. A clean and well-prepared surface guarantees optimal adhesion and a professional finish. Proper preparation minimizes the risk of bubbles or unevenness, ensuring your LED strip performs at its best and enhances the mirror’s appearance effectively.
3.3. Measure and Cut the LED Strip to Size
To ensure the LED strip fits perfectly, measure the perimeter of your mirror or the desired lighting area. Add 1-2 inches to the measurement for seamless coverage. Using scissors or a sharp utility knife, carefully cut the LED strip at the designated cut points, usually marked by small lines or nodes. Avoid cutting through the circuit or nodes, as this can damage the strip. For irregular shapes, plan the cuts in advance to minimize waste. After cutting, double-check the length to ensure it matches your measurements. If needed, trim excess material for a precise fit. Properly sized LED strips ensure a clean, professional installation and optimal lighting performance. Cutting accurately prevents waste and ensures the strip aligns perfectly with the mirror’s edges or frame. Always handle sharp tools with care and work in a well-lit area for precision.
3.4. Apply the LED Strip to the Mirror
Once the LED strip is cut to size, begin by peeling the adhesive backing. Start at the center of the mirror and align the strip with the edge, pressing it firmly into place. Smooth out the strip as you go to eliminate air bubbles or wrinkles. Ensure the strip adheres evenly, especially around curves or corners. For frameless mirrors, apply the strip 1-2 inches from the edge to create a border effect. If using clips or brackets, secure the strip according to the manufacturer’s instructions. Press firmly along the entire length to ensure a strong bond. Check each corner to confirm the strip is properly aligned and attached. Proper application ensures a sleek, professional appearance and prevents the strip from detaching over time. This step is crucial for both functionality and aesthetics. Take your time to align and smooth the strip for optimal results.
3.5. Secure the LED Strip at the Corners
To ensure a seamless and durable installation, securing the LED strip at the corners is essential. Start by applying gentle pressure to the strip at each corner to create a snug fit. For frameless mirrors, consider using LED clips or brackets specifically designed for corners. These can be attached to the mirror or wall to hold the strip firmly in place. For especially sharp corners, apply a small amount of additional adhesive or use corner mounts to prevent the strip from lifting. If the strip begins to peel away, reinforce it with a dab of clear adhesive or silicone sealant. Properly securing the corners ensures the LED strip remains in place and maintains a professional appearance. This step is vital for preventing detachment over time and ensuring the lighting remains evenly distributed. Take care to align the strip precisely at each corner for a polished finish.
3.6. Connect the LED Strip to the Power Source
Connecting the LED strip to the power source is a critical step to ensure proper functionality. Start by locating the power supply unit and ensuring it is compatible with your LED strip’s voltage requirements. Carefully cut the plug from the LED strip if necessary, then strip the wires to expose the ends. Connect the positive wire (usually marked with a plus sign or red color) to the power supply’s positive terminal, and the negative wire (marked with a minus sign or black color) to the negative terminal. If your LED strip includes a controller, connect it between the strip and the power supply to enable dimming or color-changing features. Double-check all connections for correct polarity to avoid damage. Once connected, plug in the power supply and test the lighting to ensure it works as expected. If unsure, consult a licensed electrician to avoid safety hazards.
3;7. Test the Lighting Setup
After completing the installation, it’s essential to test the lighting setup to ensure everything works as intended. Turn on the power supply and check if the LED strip lights up evenly across the mirror. Verify that the brightness and color temperature match your expectations. If the strip has color-changing or dimming features, test these functions using the remote or control system. Inspect for any dark spots or uneven lighting, which may indicate poor connectivity or improper placement. Ensure the lights are securely attached and there are no loose connections. If the lighting isn’t functioning correctly, refer to the user manual or consult a professional for assistance. Testing the setup under both daylight and nighttime conditions can help you make necessary adjustments for optimal performance. This step ensures your LED mirror lighting is both functional and visually appealing.

Maintenance and Troubleshooting Tips
Regularly clean the LED strips with a soft cloth and avoid harsh chemicals. Check connections for looseness and ensure the power supply is stable; Troubleshoot common issues like flickering or dimming by verifying wiring and bulb health. Maintain proper ventilation to prevent overheating. This ensures long-lasting performance and optimal lighting quality for your mirror LED setup.
4.1. Cleaning and Upkeeping the LED Strip
Regular cleaning is essential to maintain the brightness and appearance of your mirror LED strips. Use a soft, dry cloth to gently wipe away dust and dirt. Avoid using harsh chemicals, abrasive cleaners, or excessive moisture, as these can damage the LED components or strip adhesive. For stubborn stains, a slightly damp cloth with mild soap can be used, but ensure the strip is dry before turning it on. Additionally, check for loose connections and clean the power supply contacts periodically to prevent voltage drops. Regular upkeeping ensures your LED strips continue to function optimally, providing consistent lighting and extending their lifespan. Consistent maintenance will keep your mirror illuminated beautifully for years to come.

4.2. Common Issues and Solutions
Common issues with mirror LED strips include uneven brightness, connectivity problems, or flickering lights. These issues can often be resolved by checking the power connections and ensuring the strip is properly secured. If the lights appear dim or uneven, cleaning the strip or adjusting its position may help. Flickering can be caused by voltage fluctuations, so using a stable power source is recommended. Additionally, overheating can occur if the strip is covered or placed in direct sunlight; ensuring proper ventilation is key. For connectivity issues, inspect the adhesive backing for dirt or moisture and reattach if necessary. Regular maintenance, such as cleaning and checking connections, can prevent many of these problems. Addressing these common issues promptly ensures your LED strip continues to function optimally and maintains its aesthetic appeal.

Smart Features and Customization
Mirror LED strips can integrate with smart home systems, offering customizable lighting. Adjust brightness, color, and schedules via voice commands or apps for a tailored ambiance.
5.1. Integrating Smart Home Systems
Integrating mirror LED strips with smart home systems enhances convenience and customization. Popular platforms like Alexa or Google Home allow voice control over lighting. Users can adjust brightness, color, and schedules seamlessly. Many LED strips come with Wi-Fi or Bluetooth connectivity, enabling smartphone app control. Touch sensors and automated lighting based on time of day are additional features. These systems offer energy efficiency and personalized ambiance; Ensure compatibility with your smart home setup for optimal performance. Professional installation may be needed for complex configurations. Smart integration transforms basic LED strips into intelligent lighting solutions, boosting functionality and style.
Related Posts

hsr apocalyptic shadow guide
Uncover expert strategies in the HSR Apocalyptic Shadow Guide. Discover essential survival tips, gear recommendations, and tactics to thrive in any scenario.
antenna tv guide tulsa ok
Find the best free TV channels in Tulsa with our antenna TV guide. Get local stations, sports, news, and more without cable!

mcmasters guide to homicide
McMaster’s Guide to Homicide provides cutting-edge strategies to help you solve even the most challenging crimes. Elevate your investigation skills with expert techniques.